Wednesday, December 30, 2009

Happy New Year!!


    This past year I've slowly been adding to my collection of hairstyle tutorials, which has been so much fun! I would have loved to done more, but I've been very busy with school and just life in general. Thanks so much to all my followers for your support and suggestions! I thought I'd list some of my goals for the coming year:

    1. Create a show-and-tell album where I can display your results
    2. Post at least 1 hair tutorial a month
    3. Create makeup profiles of historical movie characters
    4. Incorporate more reader input - I want to know what you want to see!

    I'm planning on focusing primarily on movie hairstyles this year, but in the future I'd love to interpret hairstyles from famous paintings! And with one of my dear friends getting married in May, I'll have to post at least one modern wedding style!

    Have a very Happy New Year!
    Source URL: https://hairstylehairdo.blogspot.com/2009/
    Visit Hair Style for Daily Updated Hairstyles Collection

Marian's Long Loose Waves


    Note: I started out this hairstyle with wavy hair. We used a waving iron with 3 barrels for the curls. You can also braid your hair when it’s damp and let it dry that way to achieve a similar look. French braiding works the best.


    Step 1: Create foundation

    Pull sections back and fasten with bobby pins to create a half-pony tail. You’re aiming for a nice, soft look, so be a little loose.


    Step 2: Cover the base

    Using your tails, wrap gently around to create a soft, flat bun that blends nicely into your style. Noting fancy, just wrap it gently around and secure with pins.


    That’s it!! A beautiful and easy Maid Marian hairstyle just for you!!!

    Source URL: https://hairstylehairdo.blogspot.com/2009/
    Visit Hair Style for Daily Updated Hairstyles Collection
Tuesday, December 1, 2009

Update

    Welcome back!


    I've finally gotten back to work on some more tutorials. Check out the BBC's Robin Hood page, where you'll find some tutorials on how to get Marian's look! Over Christmas break I'm planning on working on some more eras, and I'd love your input. Just leave a comment or shoot me an email and let me know what you're looking for.

    Thanks so much!
    Amy
    Source URL: https://hairstylehairdo.blogspot.com/2009/
    Visit Hair Style for Daily Updated Hairstyles Collection

Gallery Directory

Marian's Hair-stick Bun


    Note: This hairstyle was done with “leftover curls” from the Marian’s Braided Headband tutorial. Follow step 1 to get the same effect. Also, the model has longer hair than Lucy Griffith’s did on the show (and super full hair on top of that!), so her finished bun is somewhat fuller than Marian’s.


    Step 1: Part your hair

    You’re going to section your hair into 3 roughly equal parts, going from ear to ear, so to speak.


    Clip the top two out of the way for now.


    Step 2: Twist

    Pull the hair straight up, and smooth with a brush or comb, then twist the hair as shown.


    Roll it around once and pin into place, leaving a tail poking out of your bun. Leave the tail for now.


    Step 3: Second layer

    Take down the second section, and divide roughly in half.


    Slightly twist one section as you pull it across to the opposite side and secure it right above the bun with a couple pins.


    Repeat with the other side.


    Next, take your tails and shape them into curls, securing around bun as shown.


    Your finished step 3 should look something like this.


    Step 4: Top layer and finishing

    Create a side part way far over to one side.


    Back comb the base of the smaller section to give it volume, pull it across and twist it as before.


    Secure with pins.


    Repeat with other side, and arrange the tails from both sides into curls.


    Mist with hairspray, and stick in a decorative hair stick or two. Or a dagger. But be careful, you don't want to cut your hair off on accident.


    We put in a brown one, which you can just barely see in the picture below. My model wasn't too keen on the idea of a dagger in her hair.


    Just gorgeous!!!!

    Source URL: https://hairstylehairdo.blogspot.com/2009/
    Visit Hair Style for Daily Updated Hairstyles Collection

Marian's Braided Headband


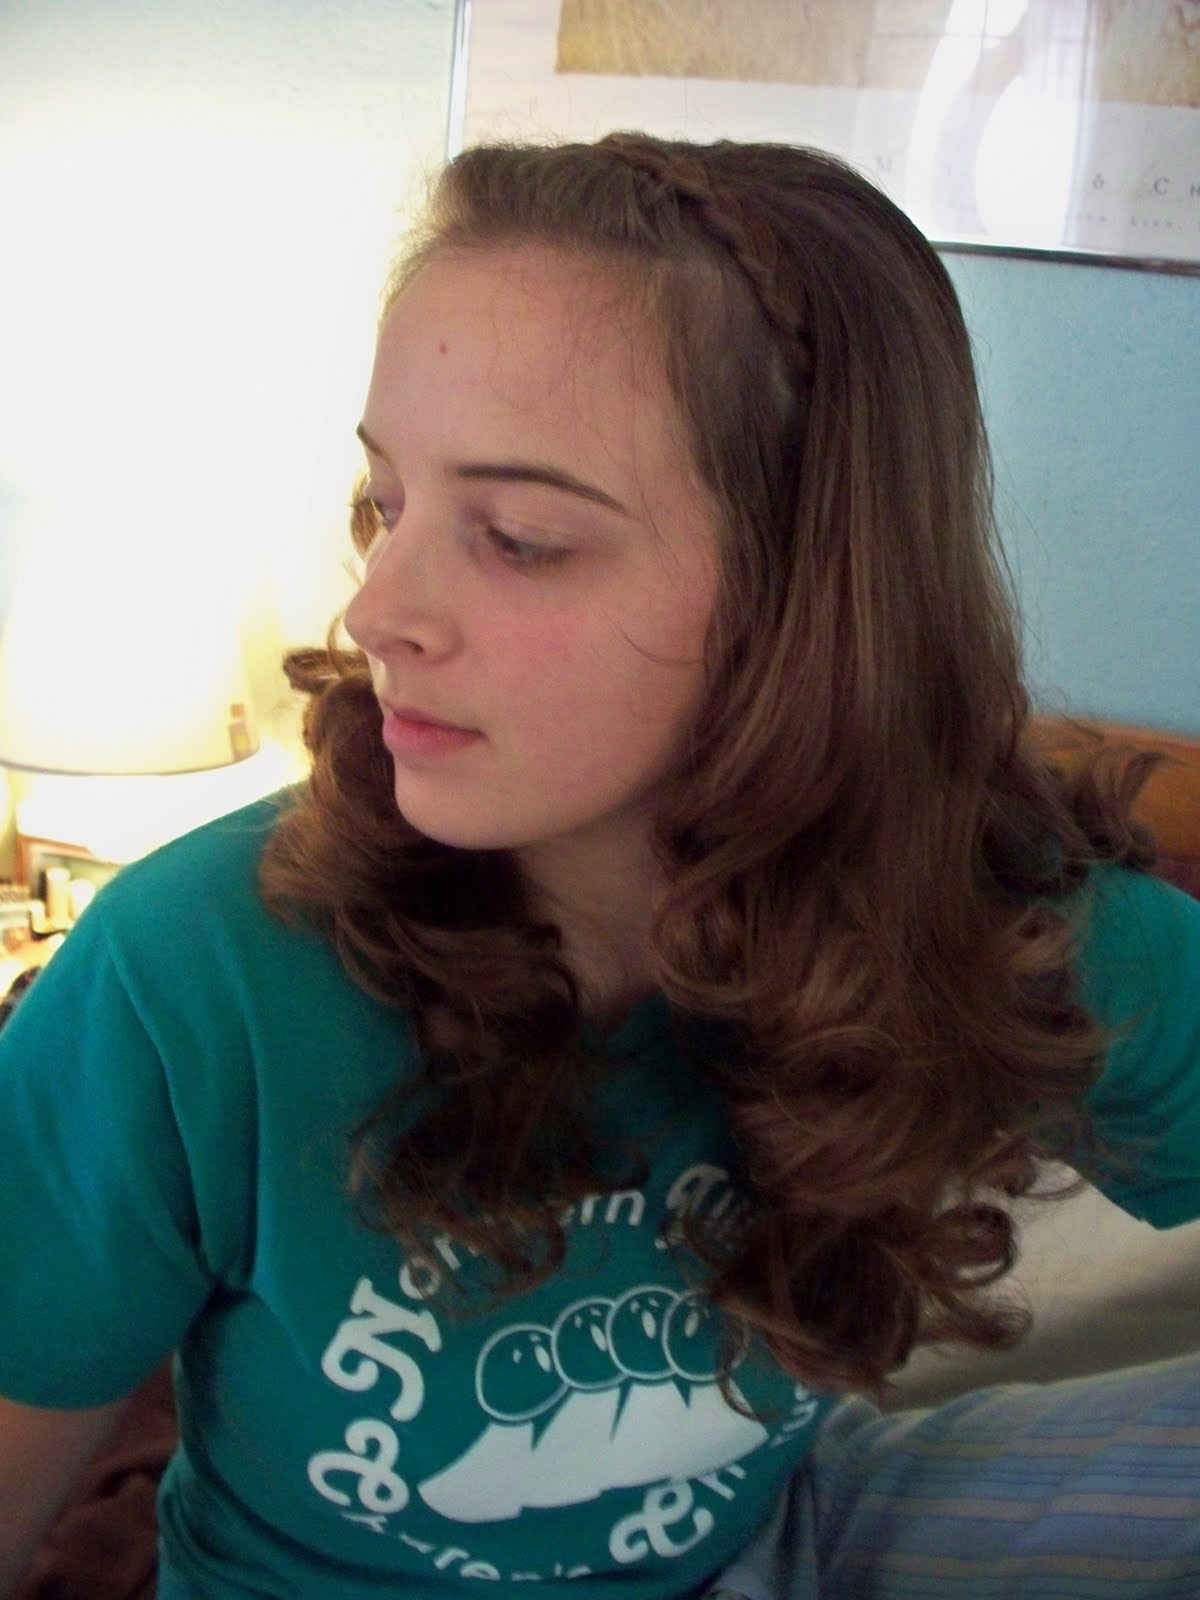
    Shown here with more of a middle part


    And here with more of a side part, which I liked better


    Step 1: Curl your hair

    Here’s how I did it. Portion off a section of hair at the base of the head, and clip the rest out of the way.


    For this style we’re curling the hair up and out, as shown.


    After I started curling, I decided to set the curls like in my Elizabeth Swann tutorial – when you’ve finished with the iron, roll the curl back up and secure with a bobby pin. This helps the curl to keep it’s shape later on.


    Finish that layer, then repeat until you have a full head of curls.


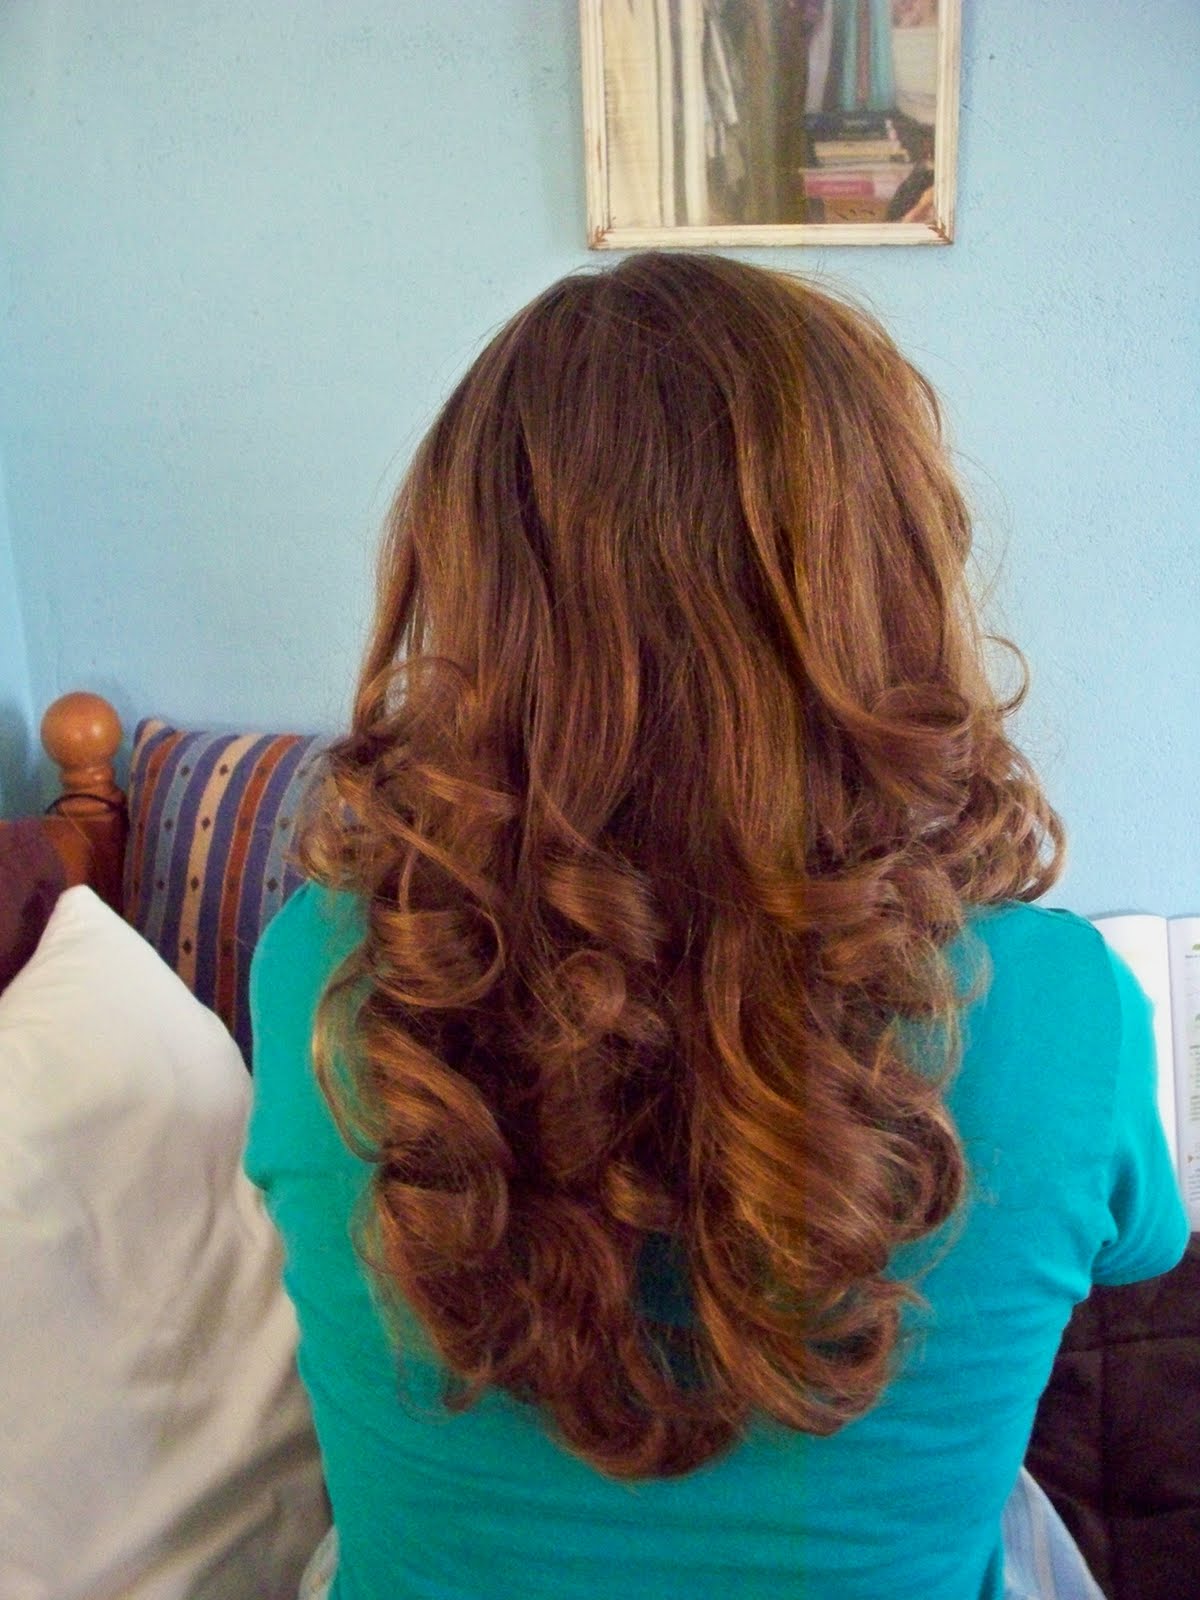
    Spray all your curls with hairspray. When they’ve all cooled, remove the bobby pins. It should look like this:


    {Before you take bobby pins out}


    {After you take bobby pins out}
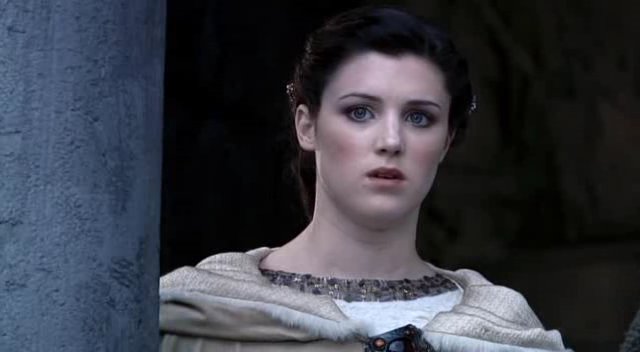
    Step 2: Part for your front section

    The front section underneath Marion’s braid is combed smoothly back, and she has a side part behind the braid. To achieve this, we need to part across the top of the head first, and then create a side part with the rest of your hair.


    Pull your front section to the side and clip out of the way for now.

    Step 3: The Braid

    Taking hair from the side (this should be the side with more hair), section off enough hair to make a good sized braid. You don’t want it to be too fat or too skinny. Make sure you take it on a slight angle, and that the hair above it will cover the base of the braid when you’re finished.


    As you braid, pull the hair across your head, so that there won’t be any bumps when you finish. Secure with a small rubber band or ponytail holder.


    Step 4: Securing the braid

    Now we’re going to pull the front hair straight up and back, and secure with a clip as pictured.


    Position the braid across the top of the head, and secure with two criss-crossed bobby pins. You may need to arrange the hair to cover up the end of the braid, using bobby pins if necessary.


    Here’s the finished look without combing out the curls:


    And here’s how it looks if you gently comb out the curls with a wide toothed comb:


    You can also do this hairstyle by replacing the braid with a leather headband:


    Tada!!!!! Beautiful, my dear!

    Source URL: https://hairstylehairdo.blogspot.com/2009/
    Visit Hair Style for Daily Updated Hairstyles Collection